* An important note to all bloggers :
This is a tremendous thank-you to all of you out there who have shown such great support & interest in my blogging topics, including this renovation assignment which had been dealt with by one of our preferred renovator, SIL BRIGHT Construction Pte Ltd.
However, I wish to bring to the kind attention of all fellow bloggers that SIL BRIGHT is unable to accept renovation projects for HDB flats.
Please allow me to take this opportunity to explain that SIL BRIGHT is in a niche market of developing private (landed) properties, namely Good-Class Bungalows. I wish to comment categorically in the capacity of a client that the cornerstone of SIL BRIGHT's success in building Good-Class Bungalows is its great wealth of experience which it has acquired as a builder of houses over the years in the construction industry.
As such, I humbly seek the kind understanding & great co-operation of all HDB flat owners to use this blogging topic as a form of reference in seeking out other renovators should you like what SIL BRIGHT has done for our home.
Thank you once again & I wish all home owners a great adventure in their search for a renovator of their choice like we did!
A draggy kick-start ...
This is an ad-hoc decision for us to install false ceiling in our living room.
It was quite a draggy event for us as existing home owners of this current flat. Apart from a never-ending series of packing & unpacking, it was unnerving for myself as we were shifting & relocating pieces of furniture and other personal effects.
The extent of such a laborious chore got the better of me and I was on the verge of giving up on installing the false ceiling!
However, we have decided to bite the bullet and persevered in conducting this stressful & dusty event which would be up & coming soon!
Stage 1 : Selecting a Renovator for installation of False Ceiling
Searching around for a good renovator for installation of false ceiling was akin to ransacking for a needle in a haystack as there were so many renovators we could have gone to. However, we were looking for the right "fit" based on our renovating requirements.
As you would have observed through my older blogging topics, we have had this habit of assessing & ascertaining on the suitability of contractors in a rather stringent manner. Apart from reference checks and other interviewing them, we seek out answers to any technical questions that we might have. And needless to say, we must be able to communicate our concerns & requirements to the contractor; and similarly, we are looking forward to engaging one who is able to address our concerns.
Even though the installation of false ceiling for our living room was a relatively small project to the extent that some renovators aren't interested in accepting it, we aimed to get it right for the first time and it's of paramount importance that we are able to put our resources together in selecting the right renovator to undertake this mini assignment. If you are wondering why we are so fussy about our selection, we wish to share that we are already staying in the flat which contained a mountain of our personal effects.
The "headhunting" was quite a stressful experience as we were running out of resources through our network as home owners who had gone through ala-carte selection in our laborious journey of giving our flat a simple face-lift to improve its appearance.
We almost felt that we were milked dry after we went through miles & miles of meeting up with contractors & interviewing them. However, we noted that some of our interviews simply didn't take off. Something just isn't working out right after the meet-ups.
Finally, we were being referred to a private developer & upon meeting up with him, we knew instantaneously that he was who we are looking for to undertake this small scale project.
He was equipped with technical expertise & offered us honest, useful advice on false ceiling designs. In fact, he recommended that we opt for a simple false ceiling that was leveled without any contours, L-boxes or cove lights and only adorned with down lights. Maintenance was also minimal for such simple designs.
From his perspective, this was a classical, "evergreen" design that would never go out of trend. And this is definitely true because I have seen such designs being repeated over & over again until today in many places that were being renovated by very well-known designers & architects.
I figured out that Simple & Beautiful is probably best encapsulated in such false ceiling designs.
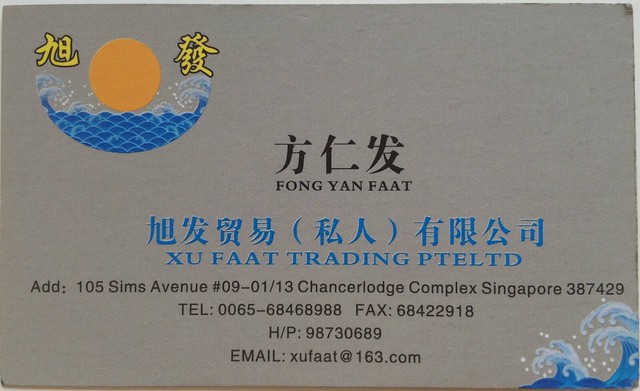
For a start, we didn't know who this private developer was even though he gave us his name card.
We knew nothing about the organisation that he owns & manages except that it was a construction firm. He had impressed upon us as a very humble businessman with very good technical know-hows in the construction industry and we knew straight off from the honest conversation that we had with him, that he was the right person for our mini project.
Little did we know that he is the director of a good class bungalow builder who had attained achievements in Singapore's construction industry with award winning landed properties that were being featured in media sources such as The Straits Times and Lian He Zao Bao (联合早报).
What fascinated us was his humble nature & there were no airs about him even though our flat was in quite a tragic state when he paid us a site visit.
We are extremely grateful to have received his attention through a wonderful recommendation from yet another valuable source!
For us, it was a God's given opportunity to have the honor of having a reputedly well-known good-class bungalow builder take up our assignment even though it deviated from their business practices to renovate HDB flats. This private developer is in fact, in a niche market of constructing & renovating private properties which had alarming budgets that could go up to tens or even hundreds of million dollars! Our bill was in fact an insignificant amount & probably a pathetic drop of water into his huge ocean of profit margins in his construction business.
By the time reality of his identity sank in, we felt embarrassed & humbled to have him take charge of this mini project which didn't do anything to beef up the profit margin of his organisation.
So for you guys out there who are curious over the identity of this good-class bungalow builder, please allow me to humbly reveal his identity as Mr David Teo of
SIL BRIGHT Construction Pte Ltd whom I have perceived as a connoisseur in dressing up the interior of good-class bungalows that are constructed by his organisation.
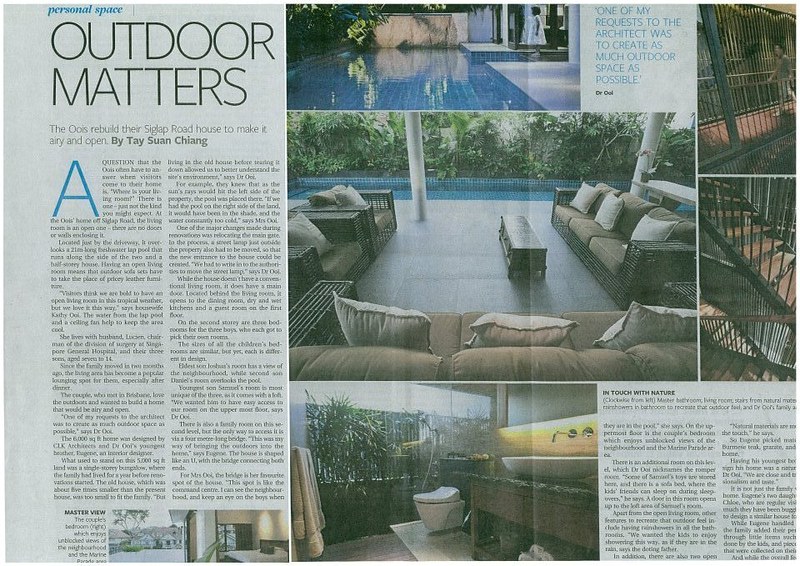
If you could recall the
Aamer Architect's
Ninety7 @ Siglap Road House that won the 2011 SIA Architectural Design Award,
SIL BRIGHT was being appointed as its main contractor during the process of constructing this magnificent bungalow at Siglap hill.
This architectural wonder at 97 Siglap Road had been featured in the press and snippets of the write-ups by the media are attached below :
<pending>
This is one of my favourite photographs of this architectural stunner taken during the evening. Isn't it breathtakingly beautiful? I could almost see myself standing on the hill top & looking down at the beautiful night scenery during the night.
For more photographs of SIL BRIGHT's other bungalow projects, please feel free to visit their face book for a visual treat of awesome, beautifully constructed & stylishly designed private homes at their facebook account at
http://www.facebook.com/silbright.
In fact, I believe that
SIL BRIGHT had other projects which are being featured in the press which have yet to be updated in its facebook account. I am saving up this space here in this blogging topic for them. :)
(Page 1 of 2) : Quite a recent project that was completed by
SIL BRIGHT & was being featured in
The Business Times on Thursday, 21st June 2012.
(Page 2 or 2) :
Pending upload
Stage 2 : Designs & Technical Issues - Cove Lighting
Designs for Cove Lighting
The contractor of our choice had mentioned to us that cove lights was a design of the past and true enough, we did notice that such a lighting concept existed as far back as decades ago in commercial buildings and some shopping malls.
I was pretty hesitant with the idea of cove lighting after both my hubby & myself gathered adverse feedback where it was a hiding place for insects, lizards, their excrement, dust & cob webs, etc. In short, cove lighting promotes undesirable outcomes and requires more maintenance.
However, my hubby was really keen to have cove lighting after we conducted an extensive research on false ceiling from the perspective of Chinese Geomency (风水).
This is excerpt from a Chinese article on false ceiling:
"天花顶宜有天池 :
现代住宅普遍层高都在2.8米左右,如果客厅屋顶再采用造型天花来装饰,就会因屋顶压得太低而让人有强烈的压迫感。
对于这种情况,可采用四边低而中间高的天花造型,这样一来,不但视觉上较为舒服,而且天花板中间的凹位形成聚水的“天池”,对住宅大有裨益。若再在聚水的“天池”中央悬挂一盏金碧辉煌的水晶灯,则会有画龙点睛之效,但切勿在天花板上装镜。另外,吊灯也不宜有尖锐的形状. "
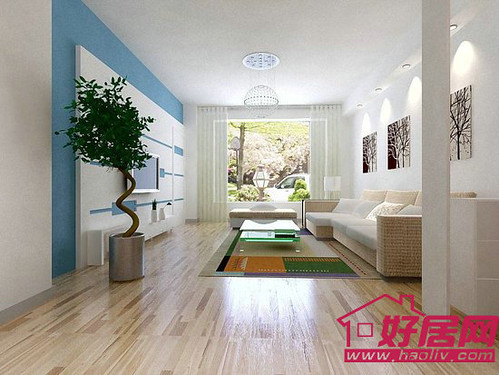
This theory has been repeatedly described in many websites on Geomency for home renovation & this concept has been illustrated in the following photographs from another website :
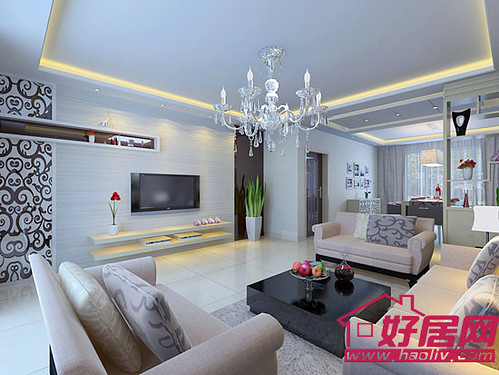
A simple ceiling with downlighted L-box running along one side of the living room.
Cove lighting has been used to light up the corners of a large living room with a crystal chandelier as a centerpiece.
This is a
Ooh-la-la design which created such an awesome looking sparkling skylight effect on the ceiling.
We built our thoughts on cove lighting designs based on a number of photographs and submitted our concept of cove lighting for our Taiwanese Master for approval. However, in view of copyright issues, we are only able to publish these selective few that are water-marked by their owners in this blog :
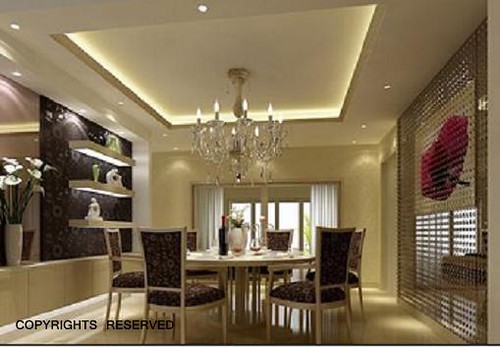
This is our preferred style of cove lighting which we would be using as a reference for our dining hall.
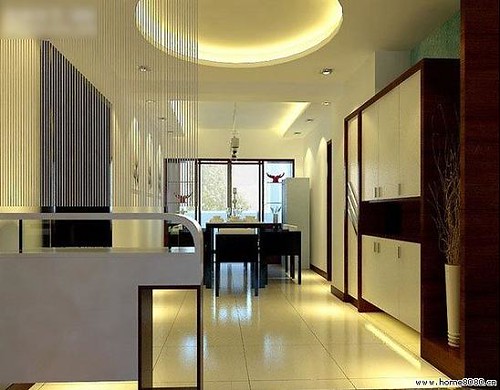
This design isn't as stylish even though I was initially keen in having a huge roundish cove lighting. For readers who came across this, I am sure many of you would be on the verge of choking with disbelief that any one of us would even take a second look at such designs. I do agree that it is nothing glamorous & looks errrrr, modest & a tad too shabby. However, please bear in mind that this photograph was used as a reference to what the chinese geomency article was recommending for false ceiling.
The ceiling for this home looks extremely complicated. It resembled a melting pot of confusion.
This is a photograph owned by Plasterceil Pte Ltd here in Singapore. This company specilises in fibre boards for false ceiling. I had to abandon the idea of a circular cove lighting because it'll lower down my ceiling & give my flat a cramped up appearance because the house in the photograph is huge with a very high ceiling.
Although our Geomencer gave a resounding approval for the false ceiling design shown in the first photograph, the local interior designers here in Singapore would be shaking their heads with great disdain as cove lighting in such styles are no longer in trend.
We have finalised the design of our false ceiling with the contractor of our choice by accepting his recommendation. So if this post of ours does interest you, stay tuned for more updates & photographs! :)
Types of Florescent Tubes for Cove Lighting : T5 or T8 ?
In the past when cove lighting was first introduced, the conventional, ugly & bulky looking florescent tube (known as T8) which are commonly seen in old coffee shops & public toilets were used.
As the lighting industry take heed of the need to be more environmentally friendly, energy saving lighting was introduced. A variation of the ugly, bulky T8 was created & this other florescent tube with greater energy savings is known as T5. It seems to be catered for cove lighting because all the holders came with a readily made "connector" such that electricians were able to trim down a lot wiring work & a shorter time frame was involved during installation.
However, the drawback on T5 is that it isn't as bright as T8 since it consumes lower energy. And depending on many other factors which are also dependent on an element of luck, nobody would be able to foretell when the T5 holder or florescent tube is going to spoil. Users & experts had advised us that T8 was a better bet on the long run. The replacement of T8 florescent tubes were supposedly easy (fuss free) and cost cheaper should the need arises.
We bought as many as 10 pieces of T8 florescent tubes & white powder-coated holders in both 2 feet & 4 feet dimensions from Yong Chuan Electric & Trading at No. 143, Joo Chiat Place (Tel : 6-440-8869) prior to the false ceiling installation.
Yong Chuan Electric & Trading is a supplier & wholesaler of lighting fixtures & electrical related accessories to subcontractors.
It carries a wide variety of electrical items such as dimmers, down lighting, all kinds of bulbs, T5 batons, KDK ceiling fans, huge reams of wirings, spare parts for sanitary wares, etc.
To put it simply, Yong Chuan Electric has a constant flow of customers every single day of its business operations and clientele base varies from subcontractors to owners such as ourselves and those who require replacements of electrical parts e.g. bulbs or dimmers.
And bulbs could be tested on the spot at the point of purchase to ensure that none are faulty.
It was a prudent decision to have purchased the lighting prior to the installation of the false ceiling.
Reason : An alarming discovery was made when the electrician & the installer discussed & discovered that the T8 tubes would definitely be exposed above the cove which had been made up of L-boxes. :(
And we were very grateful to have bought from Yong Chuan Electric because the proprietor, Andrew, had been very kind to allow us to return the T8 tubes & holders & have them exchanged for T5 batons. Can you imagine what we are going to do with 10 of the T8 lighting & its bulky, metal holders if we bought from lighting shops & are told that they are unable to return these to their suppliers? We'll be stuck with 10 bulky white elephants & not knowing how to dispose of them! :(
Apart from allowing us to obtain an exchange to aluminium-based NVC T5 batons, Andrew & his wife, Mrs Seah, had threw in Philips T5 florescent tubes.
Andrew of Yong Chuan Electric had also been very kind in advising us that it's preferable that our electrician use the readily provided connector only up to a maximum of four (4) T5 batons so as to enjoy a prolonged lifespan of the lighting.
Apart from his willingness to share his knowledge, we have observed that he is also very patient in addressing all my hubby's concerns & technical questions pertaining to T5 related issues e.g. connectors versus lifespan of T5 batons.
Stage 3 (Part 1) : Shopping for Down Lighting - Semi-recessed Type (from Jenny of SILIC LIGHTING CENTRE @ 509 Balestier Road)*
We have heard of complaints & near-to-horror stories regarding maintenance issues of down lighting whereby some home owners suffer from bulbs blowing frequently, faulty holders, high electrical consumption, etc.
However, the electrician who was recommended by our choice of contractor, had been kind enough to spend time explaining to us on the ergonomics of how PLC down lighting works. I only recalled that if the ballast is faulty, then it'll turn messy when the entire down light fixture had to be dismantled from the false ceiling.
My hubby had always been selecting fuss-free options whenever possible. When the electrician highlighted to us that down lighting with E27 holders are possible, it made our shopping for down lighting a lot easier since our choice (for E27 holders) had already been firmed up.
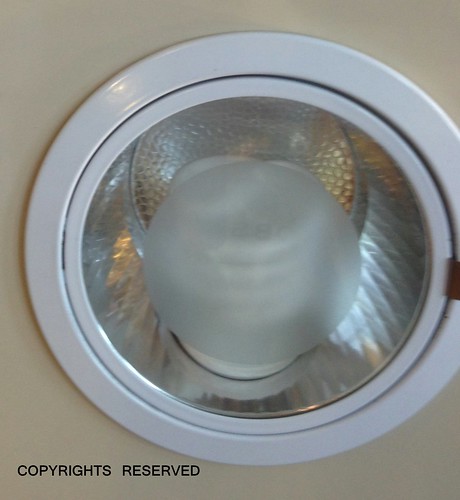
We walked through many lighting shops, and zoomed in straight on down lighting with E27 holders. Finally, we walked into SILIC LIGHTING CENTRE at Balestier and settled down on a semi-recessed down lighting with readily installed porcelain E27 holders.
This down lighting fixture is supposedly made in Malaysia. Only the centre of the glass shield is frosted. The metal parts are powder coated in white. Jenny has informed us very frankly that there are chances that the white paint would turn yellowy as it ages.
In my hubby's opinion, the fixture looked solid as compared to the rest that we have seen in other lighting shops.
We have decided to purchase from Jenny of SILIC LIGHTING CENTRE because she offered us great service with plenty of honest opinions & advice on the lighting products in her shop.
(Please scroll down to read up more about Jenny & SILIC LIGHTING CENTRE)*
She would be bundling our purchases with GE (General Electric) 840 (daylight) 12-watt spiral bulb as shown in another of this photograph taken from an unknown source:
We have placed orders for the down lighting and are keeping our fingers crossed that the transaction will be concluded in a breeze.
Tips : It is highly recommended to avoid E27 (bulb) holders that are made of plastic as such material wouldn't last. It is likely that plastic holders for the light bulbs wouldn't age well. They would turn yellow and prone to cracking up once the material turns brittle.
*More about SILIC LIGHTING CENTRE ...
Since the inception of SILIC LIGHTING CENTRE in 1967, it has been retailing lighting products in Singapore.
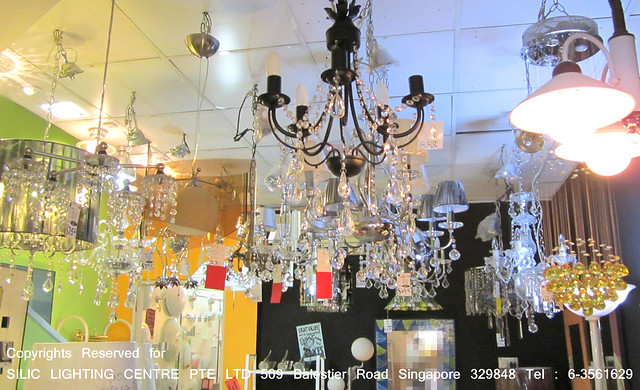
I was pleasantly surprised by the diverse styles & lighting concepts displayed in this double-storey lighting boutique. It was indeed exciting to discover so many interesting lighting designs housed in this compact-looking shop-house when it gave us the impression that it was a "doll's house" from the exterior.
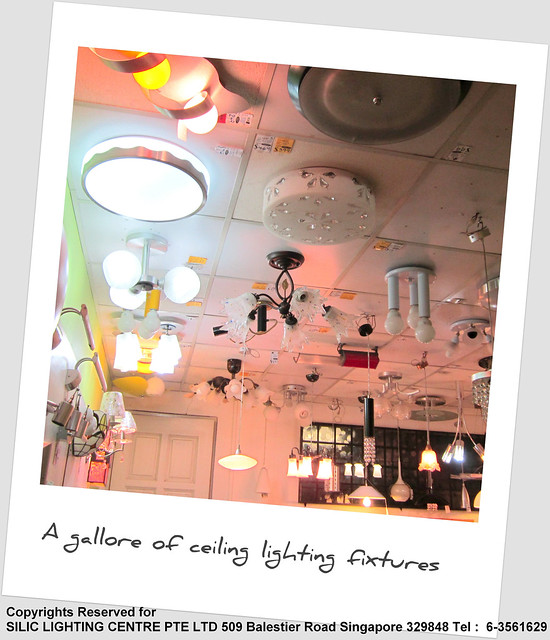
Apart from selling a good variety of readily made lighting fixtures, SILIC LIGHTING CENTRE does customization of lighting such as the ones that are featured in the photographs below:
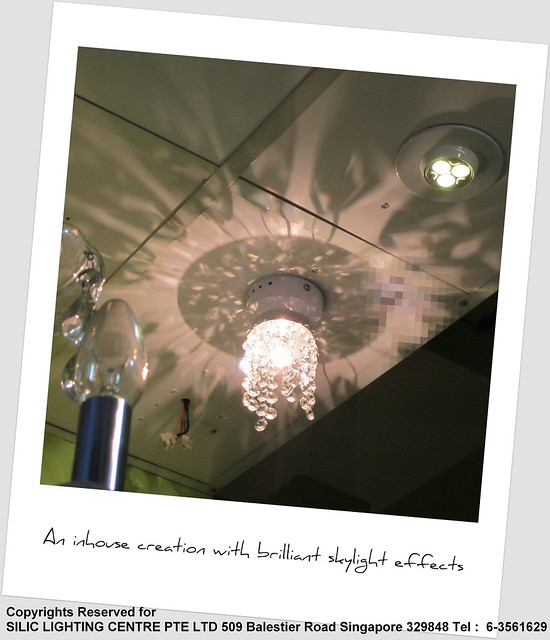
This is an in-house creation that is hand made lovingly by Jenny and is one of the many fascinating pieces that we really love as a couple.
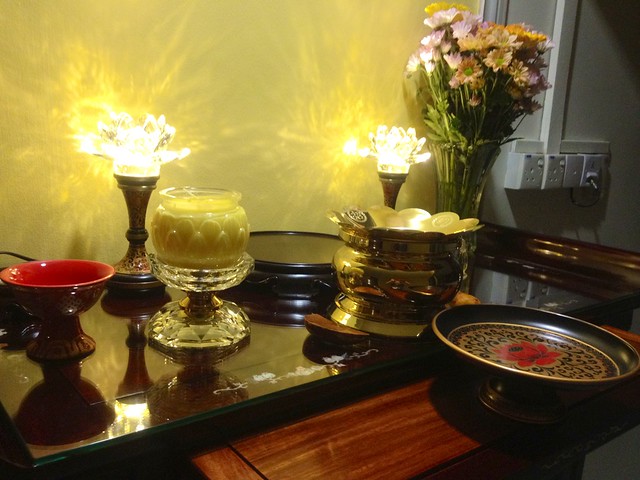
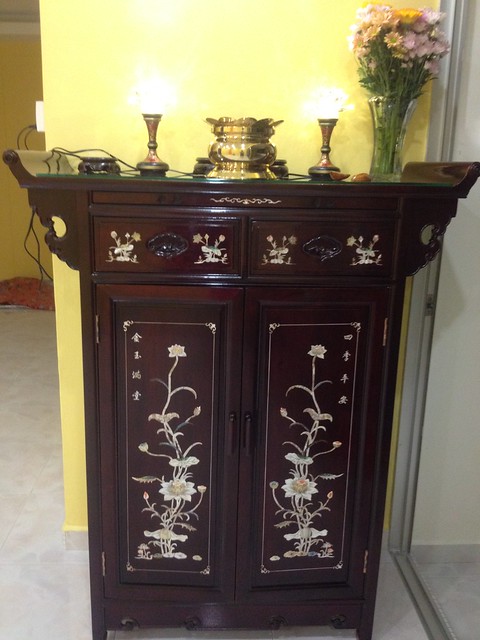
It was love at first sight for us both when we saw it at SILIC LIGHTING CENTRE and we had wanted to install this above our Buddhist altar at home.
The skylight effect is so lovely that none of the customers would ever miss it even though it was quite a dainty fixture on the ceiling.
However, we had decided not to because our living hall might look just a tad too complicated. As such, we had decided to do away with this gorgeous fixture ... much to our regrets. :(
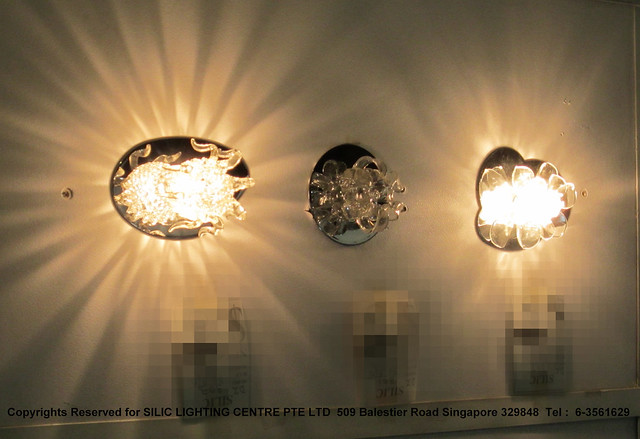
This is another one of SILIC LIGHTING CENTRE's in-house creations which are meant to be mounted on the ceiling for a pretty skylight effect that is much sought after by a modern day's home owners.
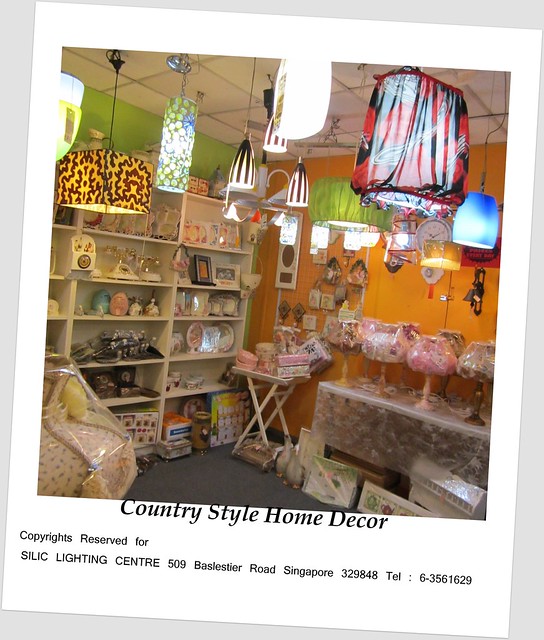
Apart from lighting products, the shop sells home decorative items such as table lamps and country style decor. If this does interest you, please visit my blogging entry on
Home Decor :
Jenny of SILIC LIGHTING CENTRE is a great joy to work with. We enjoyed dealing with her as she is very experienced in lighting products & issues.
With her great depth of knowledge in lighting products, she has such a strong competency in the lighting business given her wealth of working experience in this industry (since 1967!!!); that she is affectionately known to us as a Lighting GURU.
Jenny has a very pleasant & friendly disposition and has given us the impression that she is honest & frank in her recommendations.
During our visits at SILIC LIGHTING CENTRE, we have observed that there is a constant flow of regular (happy) customers. We could therefore make inferences that the lighting boutique had forged a relatively strong credibility in the business over the years. The importance of good customer relationship management in sustaining one's business is probably best encapsulated in such an instance.
What's really important for us as new customers is that she didn't make us feel pressurised to buy when we were browsing in her lighting shop. And we believe that it was because of her cheerful personality that helped in preserving a certain youthfulness in her youngish-looking appearance even though we found it incredible when she told us her real age!
These other photographs of ceiling lighting in her shop, of which we enjoyed looking at and would like to share this with fellow bloggers.
Lighting fixtures found at the back end of the store.
We would like to call these "no-frills" ceiling lighting which would never go wrong in styles as they are likely to be classics with its simple designs.
I am attracted to the tri-ball design shown on the left hand side of the photograph and had shortlisted this in my list of lighting.
A comprehensive range of lighting essentials, including all types of bulbs, florescent tubes in all sizes & shapes are displayed on the wall.
Down lights of different shapes & sizes are also found in this "workshop" corner at the back end of the shop.
We felt that this is a very systematic manner of displaying lighting wares and is good for customers who would like to have a
"hands-on" approach in examining the ergonomics of down lights.
This is quite a favourite of ours because everything seems roundish. However, our ceiling isn't high enough to accommodate to the lengths of glass beads dangling down from the mirrored "base" which is to be mounted on the top of the ceiling.
But this is a piece that's worth considering if you have a relatively high ceiling at home.
It's something that's modern & pretty to have at home!
Another variation of "multi-stranded" lighting that casts an interesting reflection on the nearby walls.
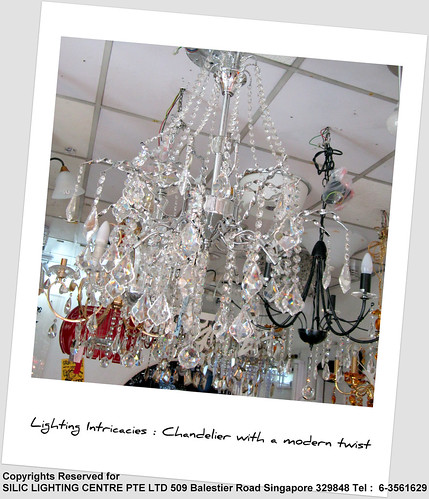
I would always find chandeliers a romantic addition to any home even though it warrants a lot of maintenance.
This is quite a classical design for a simple chandelier which had been too low for our ceiling. The dangling pendants would risk getting damaged if the hot steam ever gets to it from the steam boat during special occasions.
As such, we had to forgo it during our shortlisting process for a lighting centrepiece at our dining hall.
It's a great pity that I wasn't able to take a better photograph of this modern chandelier.
Contrary to what's featured in this snippet where the chandelier is being portrayed as a mangled mess, the actual piece was a gorgeous looking piece that's contemporary in style.
I would highly recommend this to anybody who wanted a chandelier with a modern twist.
Stage 3 (Part 2) : Shopping for Decorative Lighting - Chandelier(from DESIGN LIGHT @ Jalan Besar Plaza)
For now, we have booked our decorative lighting after my hubby had brought me down to Geylang, Jalan Besar and Balestier over weekends for viewing. I had to look through on my own during week days as there were just too many shops to start with and it was impossible to cover every single lighting shop within a day or two.
We were initially struck by the beauty of a crystal lighting at Lightings.com @ Balestier. The sky lighting effect that was created by the product was awesome, modern & beautiful. It was priced at $480 and after much consideration, we have decided to forgo its purchase as there were too many chromed parts on the lighting.
As such, the decorative piece would not age well especially when we would need to use a damp cloth to polish the huge amount of crystals that were dangling from the holder.
And because of the beautiful sky lighting effects, the lighting fixture was attached to a mirrored "base" that held on to all the crystals & whatever decorative stuff that dangled down from it. Based on the Chinese article on Geomency 风水 where mirrored ceilings are a big No-No, we were quick to give up on this lighting fixture.
My hubby wasn't keen on chandeliers right from the start. However, after we visited DESIGN LIGHT at Jalan Besar Plaza during the evening, a chandelier caught his eye because the shop's lighting specialist, Rachel, informed us that the metal parts were made of aluminium and would last us a long time as genuine aluminium don't rust.
(DESIGN LIGHT was nice to let me test out the metal parts of the chandelier with a huge round piece of magnet & true enough, the magnet does not attach itself to the metallic sections!)
The pragmatic streak started working on him and much to my surprise, he got interested in chandeliers all of a sudden.
We had been warned by many lighting shops that chandeliers require a lot of maintenance as it attracts dust & the crystals would be less sparkly. In addition, they promote a lot of heat in the room especially when the ceiling isn't located at a relatively tall height, which is definitely the case for flats.
After contemplating and deliberating for several weeks, we were still unable to find a better substitute than this chandelier that caught our eyes at DESIGN LIGHT.
So we were all set for our first choice when we dropped by DESIGN LIGHT during our 3rd trip at the shop.
In fact, there were 2 sizes. However, due to space constraint for our dining area, we selected the smaller of the two even though we would have preferred the larger version. The reason being that it looked a lot grander. (Please scroll down to look at Tips for selecting a chandelier) *

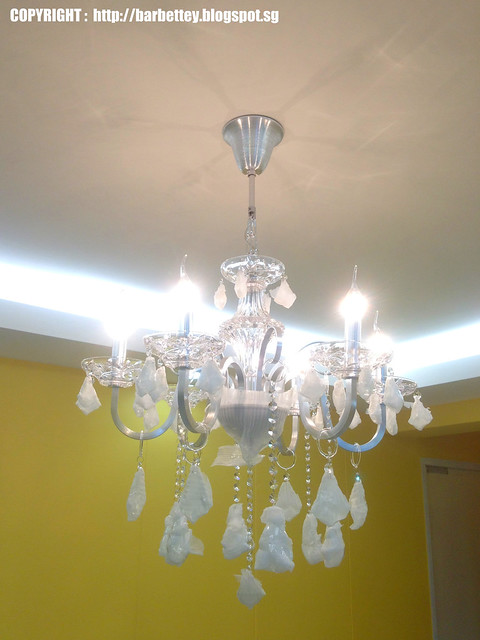
This is a photograph of the Egyptian crystal chandelier that we booked through a lighting specialist, Rachel from DESIGN LIGHT. The display piece had 2 versions of bulbs, namely clear & frosted with a curvy tip resembling a caricature of a flame. We have decided on clear bulbs with curvy tips.
We are keeping our fingers crossed that the chandelier that are delivered to us is in tip-top condition without any scratches, cracks or missing pieces.
Now that we are in the midst of acquiring a chandelier, we would like to share our impression of DESIGN LIGHT. I would like to call this lighting shop
A Dream House of Chandeliers as there is a huge variety of chandeliers that are found in there. This lighting shop is in fact, a wholesaler for lighting as indicated in their website at
http://www.designlight.info/ .
Unfortunately, this wholesaler has not granted us permission to take photographs in their showroom. As such, I wouldn't be able to showcase any of their chandeliers in my blog apart from the chandelier that we bought.
Tips for differentiating glass & crystal (lighting) : We were told by another high-end lighting boutique that there are remarkable differences between so-called China "crystals" & genuine crystals. China "crystals" are in fact made of glass. As such, it lacks an ability to cast out colourful spectrum which is commonly seen with prisms when held at an angle under lighting.
And because of the inherent quality of glass, lighting fixtures that are made of these commonly known as China "crystals" would have a flat & monotonous tone to its outlook unlike its crystal counterparts.
In addition to the above, lighting fixtures which are made of glass would feel a lot lighter than crystals. Crystals of similar size & shape as that of its glass counterpart would have a heavier weight as there is lead content in them.
We have tried weighing many of these beads in different shapes & sizes in our palms & anomalies are easily detected through comparison between crystals & glass beads!
Tips for selecting a chandelier : It was really fun looking at chandeliers as the intricate designs for classical chandeliers are varied alongside their counterparts of a modern & contemporary style.
However, what is considered too huge a chandelier for a home? This question arises while we were in the midst of choosing between 2 chandeliers of different sizing *. So we have decided to research through search engines & we have briefly summarized the following which serves as references to home owners who are in the midst of acquiring a chandelier :
Selection by chandelier's height : Approximately 30" above the dining table.
Selection by chandelier's diameter :
Mini Chandelier (less than 20" in diameter) : if dining room is less than 15 ft by 15 ft in size
Mid-sized Chandelier (between 20"-36" in diameter) : if dining room is 15 ft by 15 ft in size
Large-sized Chandelier (more than 36" diameter) : if dining room is more than 15 ft by 15 ft in size
Other formulas for calculating the ideal diameter of a chandelier :
Length (of the room in feet) + width (of the room in feet) = ideal diameter of chandelier (in inches)
Diameter of ideal chandelier must not exceed 0.5 x width of table
Maximum diameter of chandelier : Table width (in inches) - 12"
The final outcome : We have decided to forgo guidelines recommended by the useful websites on chandelier selection.
Reason for deviation : If we followed the guidelines, we would have to forgo our favourite chandelier & end up with really small chandeliers that we do not fancy!
Stage 4 : Washing & Scrubbing walls
Our living room walls certainly didn't age well given the regular use of joss sticks over the past 10 years. The last painting those walls got was more than 8 years ago and there were many stubborn and patchy stains on them.
However, we are certainly grateful for the advice given by NIPPON PAINT & the painting team leader, Louise who was recommended to us by SIL BRIGHT.
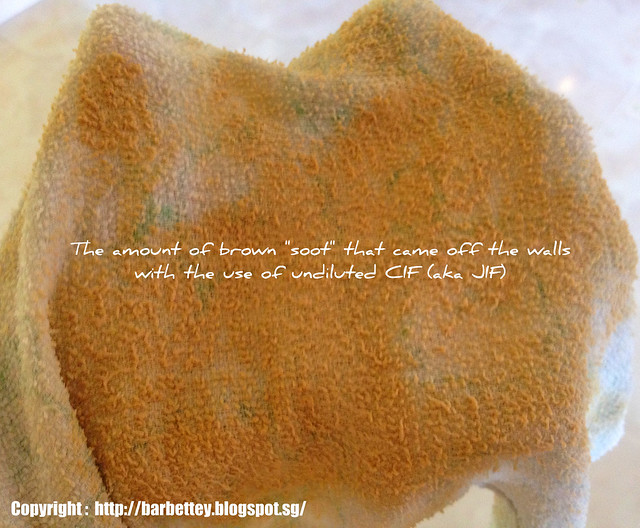
The most challenging part of it all was an attempt to remove or lighten those dark brownish stains arising from continuous burning of joss sticks over a decade of living in this flat. It was necessary to try to remove the stains so as to prepare the walls for a new coat of paint. Otherwise, the sooty stains would reappear on the wall surface after sometime when the oil-based sealer & new coat of paint are being painted on it.
We were supposed to wash the walls by spraying them with a flask of diluted Jif (which is now known as "Cif"). See photograph below for photograph of "Cif" - copyrights reserved.
But I discovered that those patchy stains of grime & brown "soot" are so stubborn that such formulations aren't working.
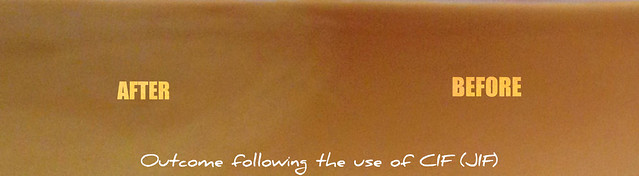
As such, I have undertaken a tedious job of scrubbing the affected areas with Cif being applied on a thick piece of damp rag and look what came off from those walls!
The photograph below shows a section of the wall which had been cleaned by CIF.
However, I need to highlight that this is a very tedious & time-consuming chore which took 2 days for me to scrub off these stubborn sooty stains from the walls. And I am hoping that this would be the last time I would be dealing with such a situation. :(
Removal of mold from walls
Apart from this tedious attempt to scrub off these sooty stains, we would also like to thank
NIPPON PAINT for lending us their valuable support in advising us on steps taken to remove the existing mold from our walls.
Step 1 : Dilute one part of home bleach with five parts of tap water.
Step 2 : Depending on the severity of the mold infection, cut a piece of rag into desired sizes
Step 3 : Dip a piece of newly cut-out rag into diluted bleach prepared at
Step 1
Step 4 : Wipe off the mold from the wall using the rag from
Step 3 once only and throw away the rag. (This is to prevent the mold on the rag from being transferred to other sections of the wall)
Step 5 : Repeat
Step 3 &
Step 4 on other areas of the wall which are infected by moldy spots.
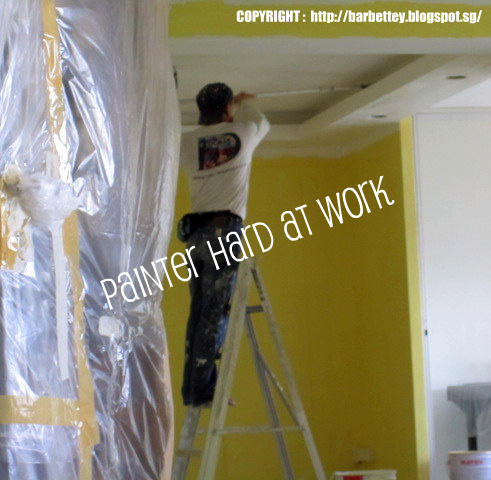
Stage 5 : Rewiring by Electrician
We were very happy & grateful to have been introduced to the private developer's electrician, Mr Lim Hong, who is affectionately known as Ah Hong by the other subcontractors.
It came to our observation that he is a person of a very strong sense of urgency where work is concerned & is eager to get down to serious business. In addition, he has a very strong mental alertness despite his busy work schedule as an electrician - his agility (both physical & mental) had never failed to amaze us even until today given his fitness level at his age, which didn't match with his somewhat youthful appearance.
And what's most significant in this transaction is that he has very good workmanship & both my hubby & myself were absolutely impressed by his rewiring works - it was so neatly done that we were extremely pleased with the rewiring outcome.
We are giving him a double thumbs-up for his workmanship on electrical works!
Since we are notorious for being fuss-pots and have awarded Mr Lim Hong with full marks for what he had done for us, I could make the inference that his workmanship is indeed EXCELLENT!
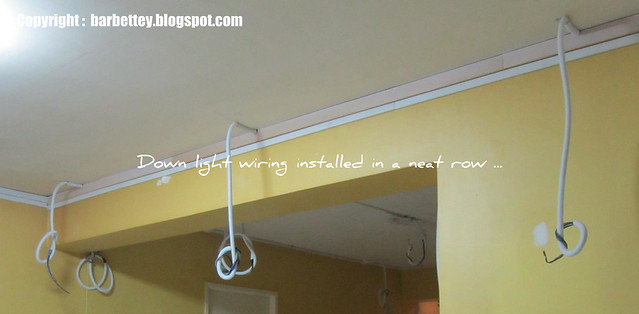
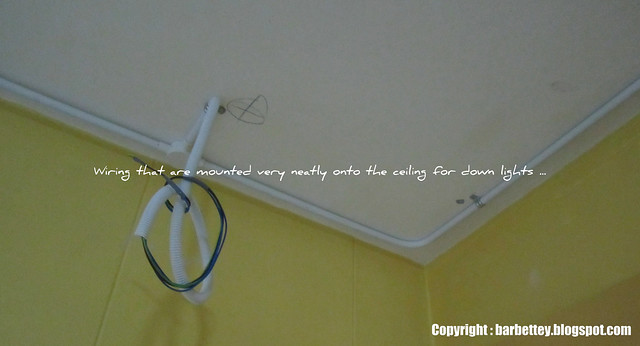
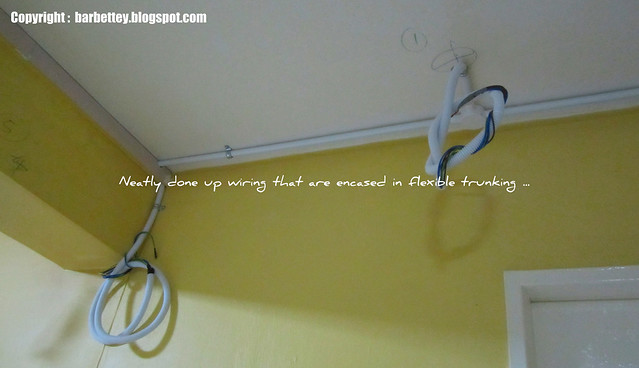
More of such photographs are taken to substantiate our claims of his wonderful workmanship in rewiring. Aren't the rewiring neat & organised? :) We are certainly in good hands! :)
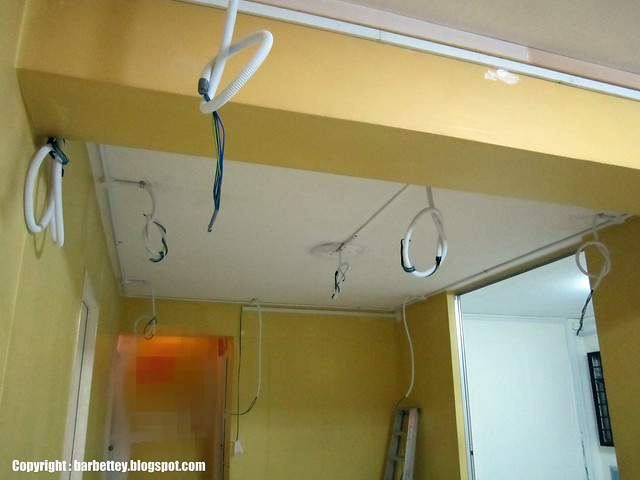
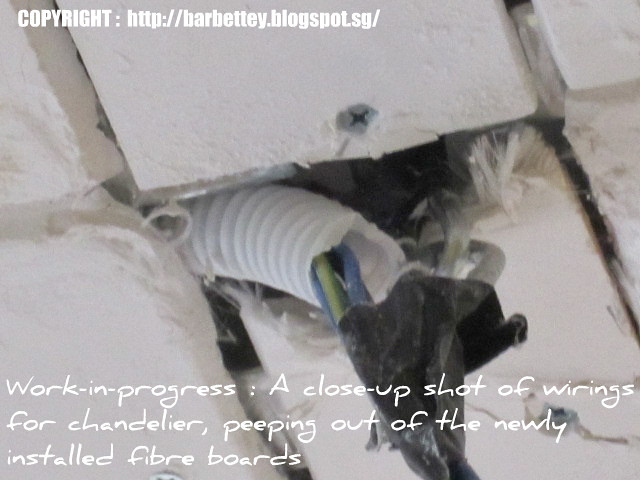
Repetitive photographs of wiring encased in flexible "tubes" to facilitate installation of down lighting. Positions of down lighting are marked onto the ceiling as shown in the photographs below:
The photograph below shows a bundle of wiring on the left hand side that is meant for connecting cove lighting inside the L-box. The other bundle of wiring situated at the marked section of the ceiling (on the right hand side) is for down light.
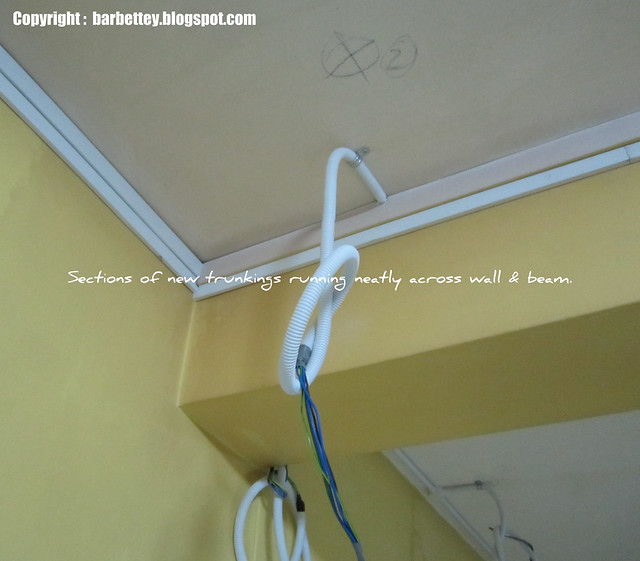
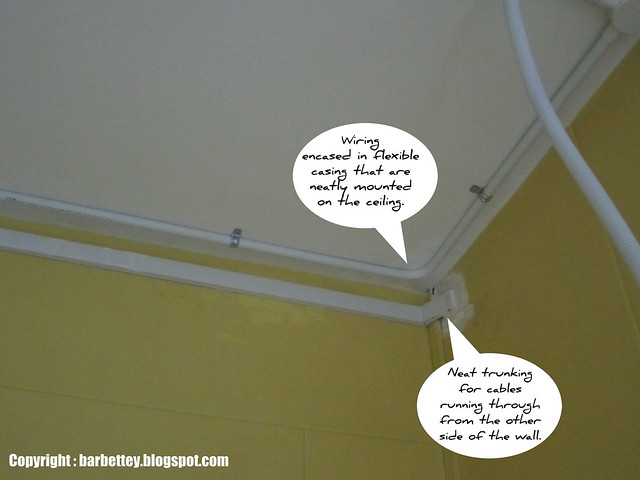
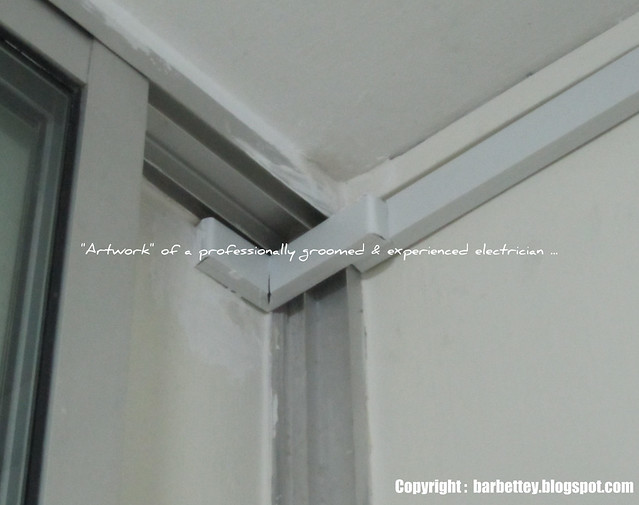
We require relocation of cables which had to run through the wall of our TV room and Mr Lim had done a neat job by drilling through this extra hard wall with lot's of metal bars & brackets concealed from within. White plaster was also used to restore any crevices & chip-offs on
both sides of the wall arising from the drilling.
Based on our expectations, this was work well done! And we are very happy to extend our compliments for his workmanship on our blog. :)
(The white trunking on the other side of the wall is laid out by Mr Lim. Isn't it neat & nice-looking?)
Mr Lim had also been very considerate in retaining one of the existing ceiling light so that we wouldn't have to grope in the dark pending completion of this renovation. And we deeply appreciate what he had done. Kudos to you, Mr Lim! :)
Stage 6 : Installation of False Ceiling
Finally, after a seemingly endless trail of hunting down our lighting fixtures, we got down to the stage of installing false ceiling in our home.
While we were seized by a massive wave of euphoria, the shifting & packing up of personal effects to make way for ala-carte renovation works were starting to take toll on our stamina. We were running out of steam & felt that the shifting was a real chore & a pain. :(
It was definitely tiring & we told ourselves that this would be the last mini renovation we shall have for this existing flat. Should we require renovation for our new home in the near future, we would definitely be consolidating our wish list & assigning the entire renovation to a main contractor.
We had been mentally prepared for an impending sand storm that would be confronting us head-on as owners staying in the flat while renovation was on-going.
Protecting existing personal effects of the flat :
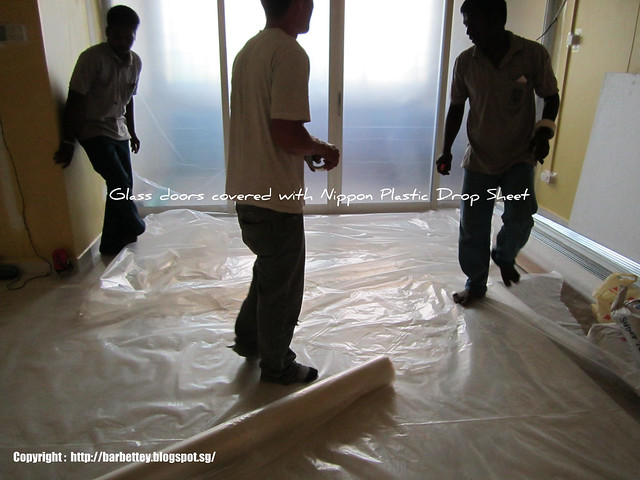
I was told that the situation would be nightmarish as dusty particles would be flying all over our flat while materials are being sawed & that'll be lots of drilling taking place. We covered all our bedroom doors & sliding glass doors with huge sheets of NIPPON Plastic Drop Cloth which could be purchased from Lye Trading at Block 825 Tampines Street 81 (Tel : 6782-4466
).
The photograph below shows our glass sliding doors being covered with NIPPON's Plastic Drop Cloth.
Mr David Teo (from
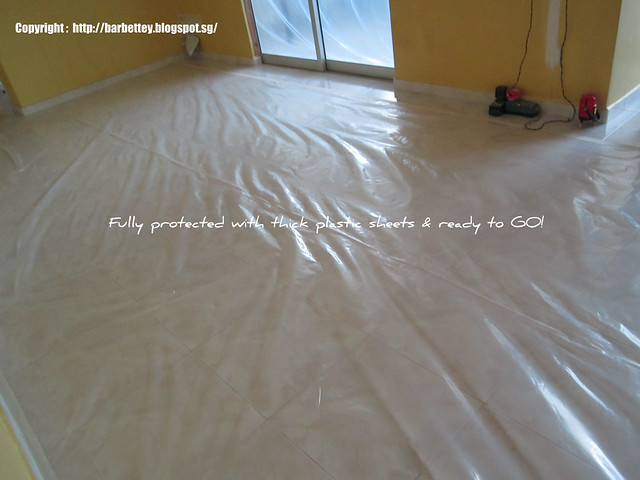
SIL BRIGHT) had also arranged for his workers to lay exceptionally thick plastic sheets and corrugated paper all over our tiles in the living room to protect our flooring which had been tiled more than 10 years ago.
A large roll of plastic sheet was spread over the entire flooring in our living room and held in place by masking tape.
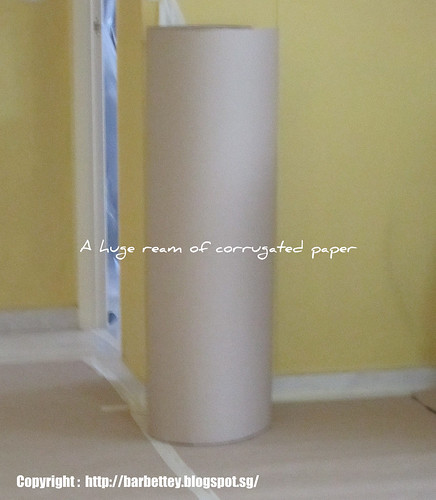
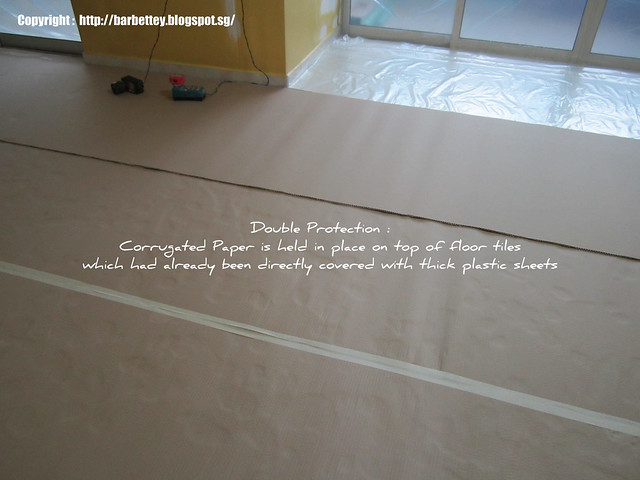
After the thick plastic sheets were held in place, corrugated paper was rolled onto the floor to provide further protection & friction for walking around by both workers & us owners.
The photograph below shows a huge ream of corrugated paper which isn't something that's new to us owners as we had first seen it during demolishing works when our bedrooms were being restored to their original HDB condition.
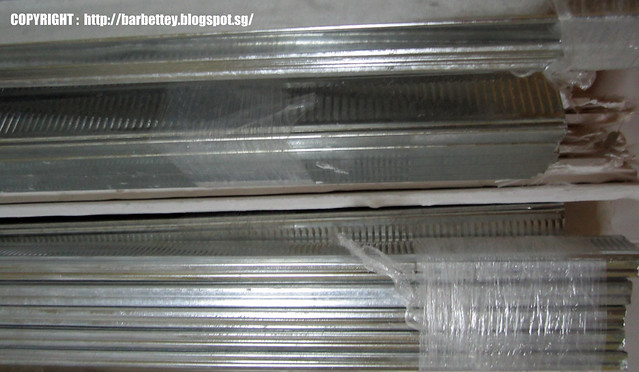
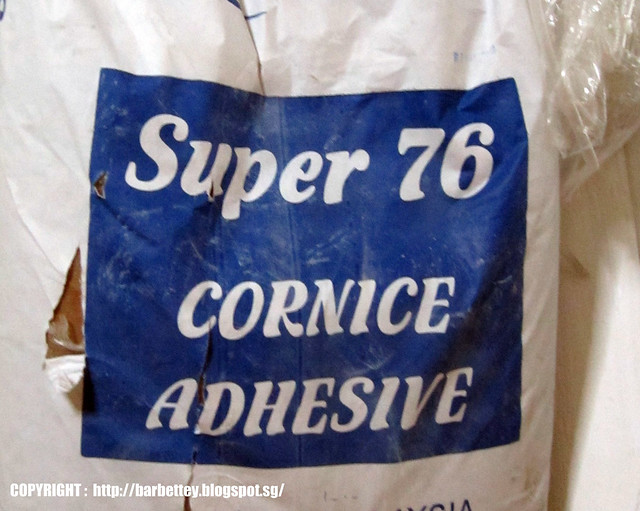
Raw Materials for installation of false ceiling :
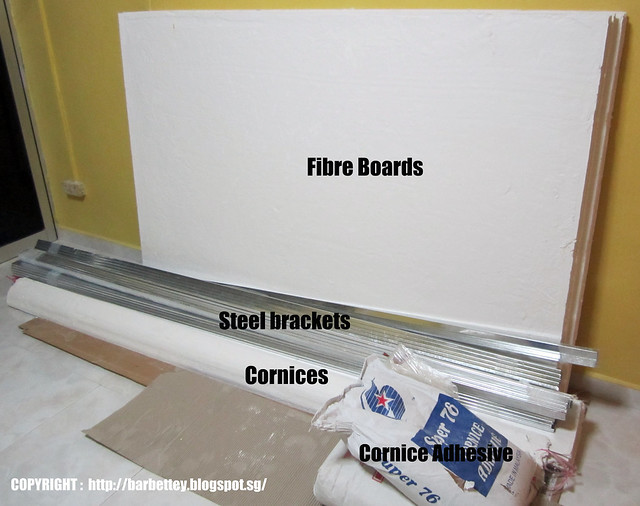
Please allow me to share a few photographs of the raw materials that had been used to construct our false ceiling.
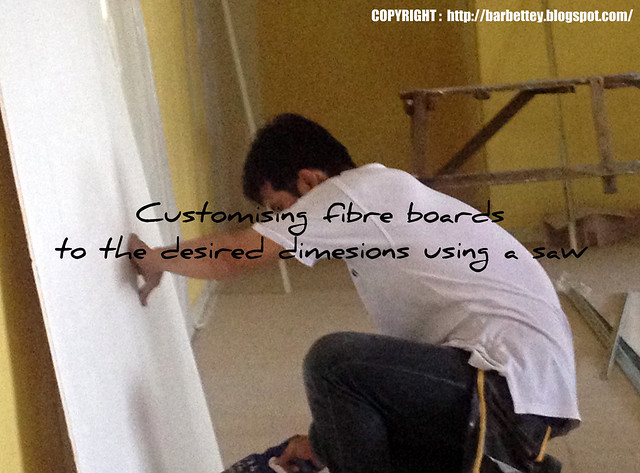
Even though these fibre boards were supposedly 9 mm thick, I was surprised by its heavy weight. And I had been told that its "graffiti" does cause skin allergies in some people so I was eager to stay away from these raw materials when they were delivered to our home on the eve of the false ceiling renovation.
This is probably used for joining fibre boards together.
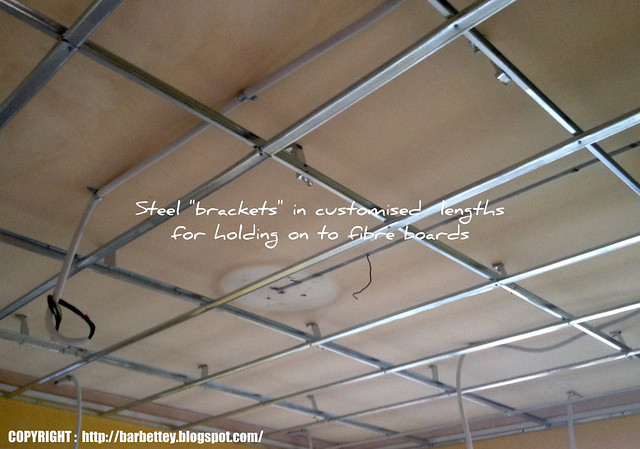
Long steel bars that would be cut by the installers to serve as brackets to holding the fibre boards to the actual solid ceiling.
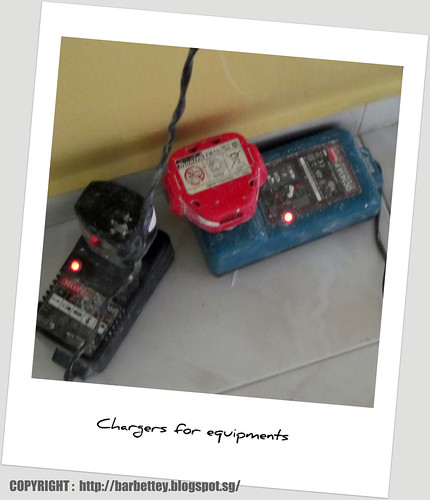
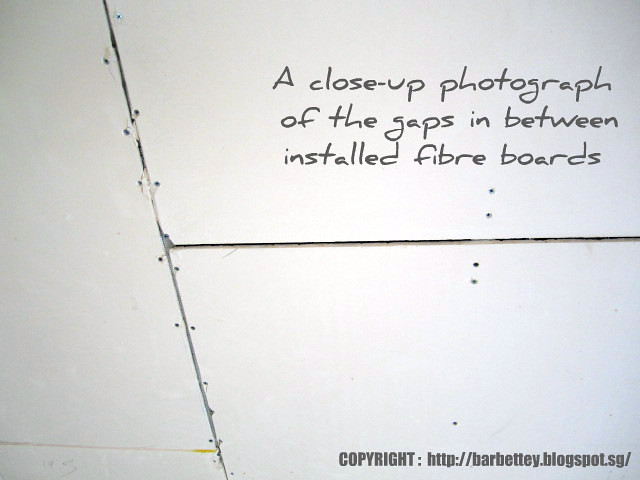
Installation of Fibre Boards
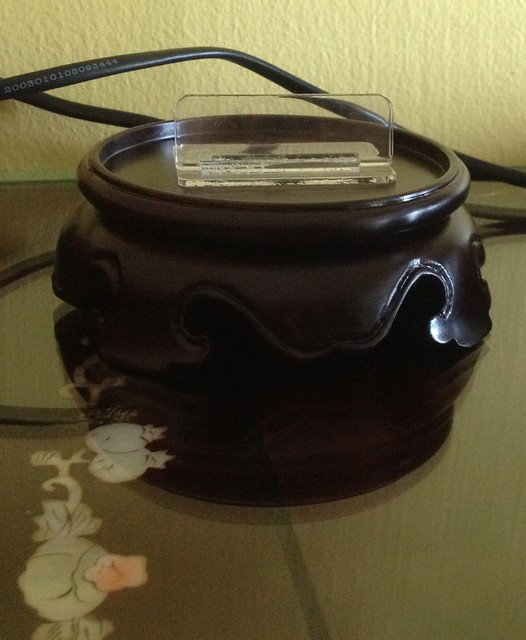
The installers started out in charging their drillers and a laser "writer".
We presume that these were chargers for drillers that were used to drive in nails.
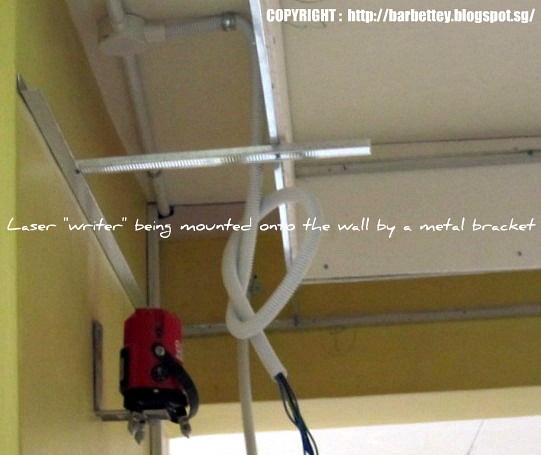
This cute-looking red tripod-like gadget as shown in the above photograph is attached to the wall (as seen in the photograph below) for marking out the position of the fibre boards against the wall. To put it simply, it serves as a guideline to installers for marking out the height of the fibre board.
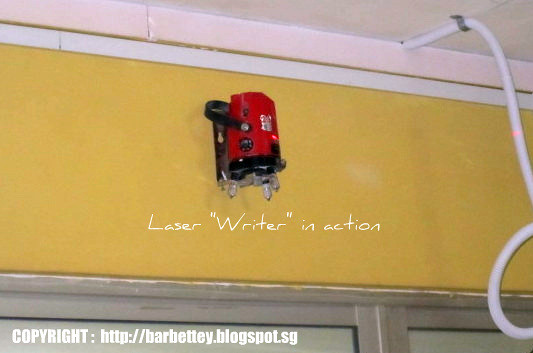
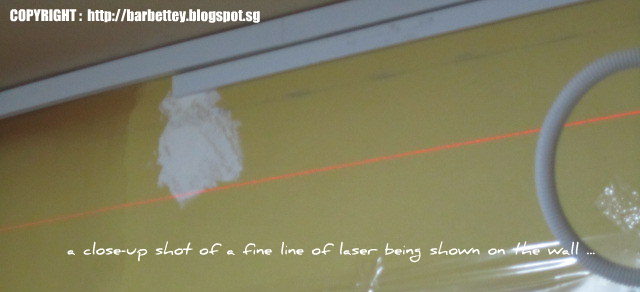
After which, the laser "writer" emitted laser lighting in the form of very clear, definitive lines onto the wall as shown in the photograph.
Another photograph of the laser "writer" which had been mounted onto the wall.
Photographs of walls & beam being "marked" by laser.
To illustrate further on the execution of the false ceiling, we had taken so many photographs that we took quite sometime to decide which ones to use and which ones to discard.
Please refer to the following photographs with captions included for descriptive purposes :
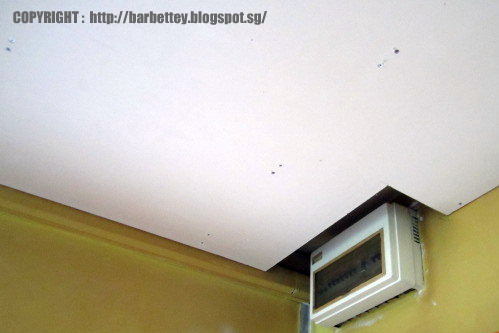
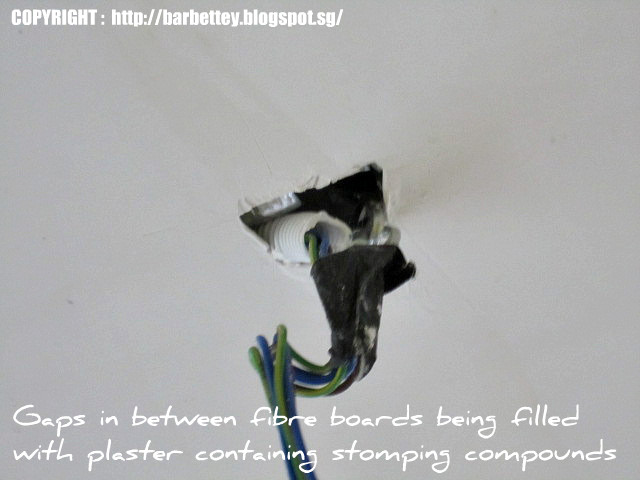
A "hole" in the false ceiling had been created to accommodate the main circuit board for our flat as shown in the photograph below:
After covering the existing trunking with L-box, plastering is done to cover up all the gaps & give the entire false ceiling a nice finishing. The photograph below illustrates plastering in progress (sorry about the bad photo shot in view of the lighting).
The next segment of this write-up would cover the installation of false ceiling for the inner section of the living room where L-boxes would be created to accommodate to cove lighting. Without further delay, I would like to launch a series of photographs taken while renovation works was still in progress for the ceiling.
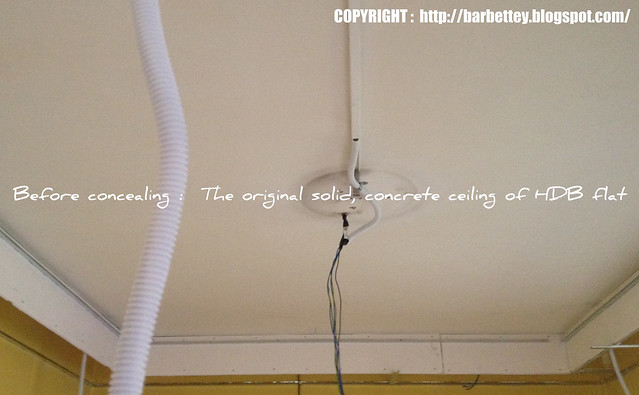
We were lucky that the height for our concrete ceiling was relatively high at about more than 2.6 meters. However, we had indicated to
SIL BRIGHT that we didn't want an oppressive feeling in having low false ceiling. We were definitely lucky to have engaged
SIL BRIGHT because their installation team had already preempt our concerns & efforts were definitely made to address them.
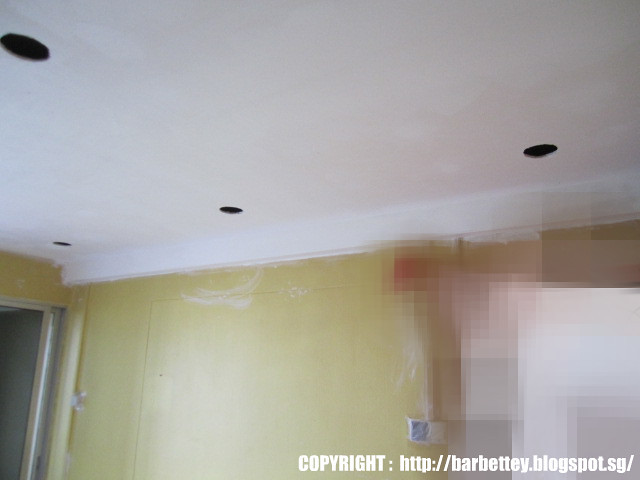
The photograph below shows the original concrete ceiling of our flat prior to any installation of fibre boards.
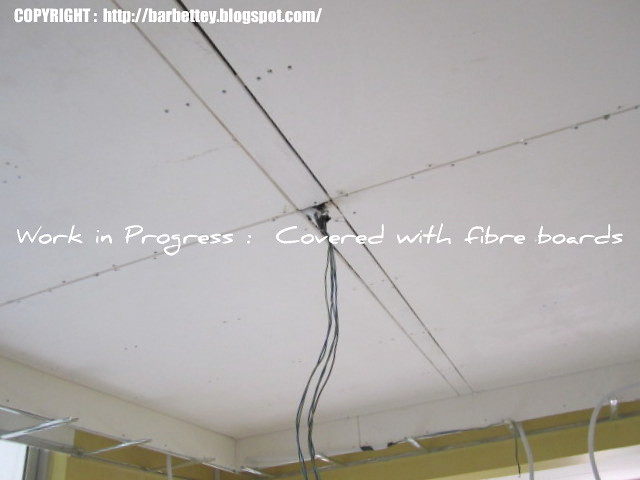
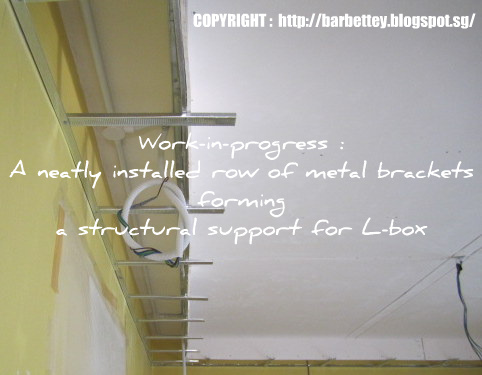
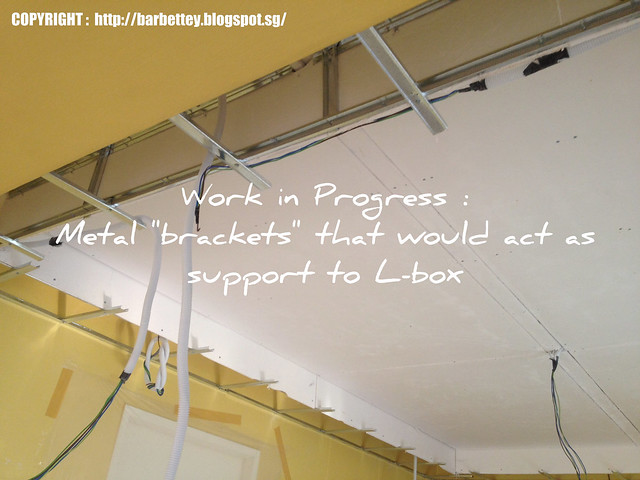
Not unlike what's described earlier as above for installation at the first half of the living room, the same technique of installing a grid-like metal structure comprising intersection of metal brackets was applied onto the solid concrete ceiling. The outcome is as follow:
As we have opted for an all-surrounding cove-lighting effect, metal brackets were being mounted onto all four (4) sides of the wall to act as a support to L-boxes which would be installed to facilitate installation of both cove lighting and down lighting.
An enlarged photograph of the neatly installed rows of metal structures on all four (4) sides of the wall in the inner section of the living room.
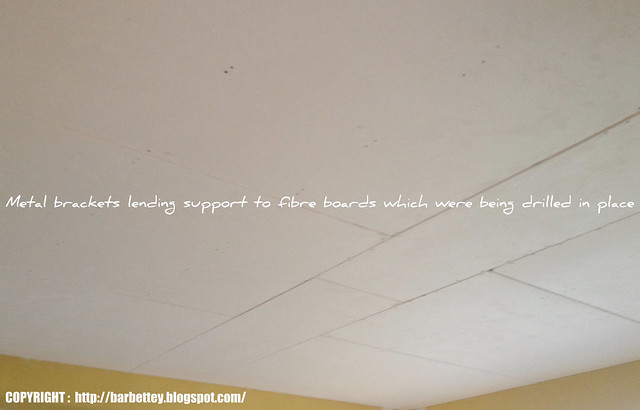
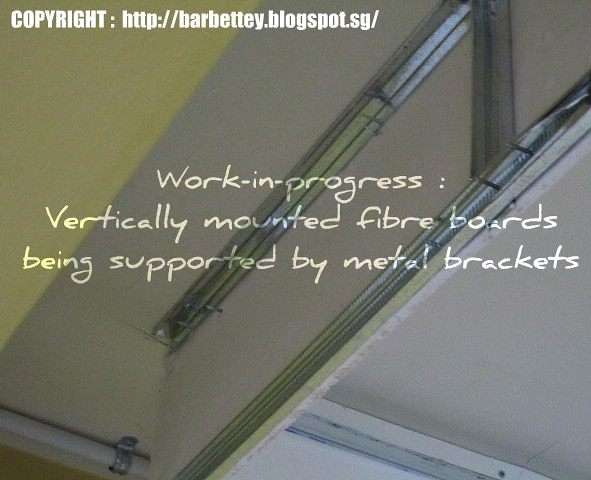
In order to segregate L-boxes from the central ceiling, fibre boards were also installed in the style of vertical panels being nailed in place with metal brackets as shown in the photograph below:
The centralised lighting for this inner section of the living room (which would be converted into a dining hall) is enlarged to illustrate the newly mounted fibre boards. It definitely looks "raw" and awful pending plastering to beautify the outlook of the false ceiling.
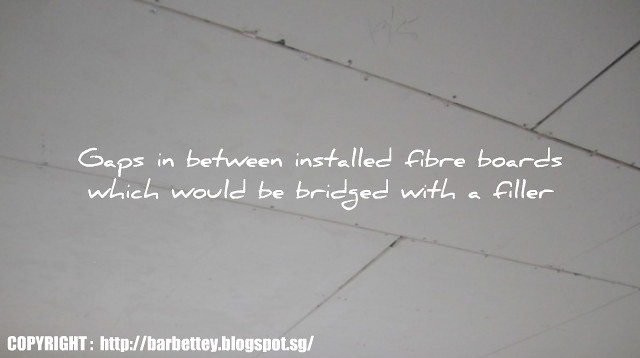
As you could see from the next photograph below, how plastering with a mixture that contains stomping compound had beautified the newly installed false ceiling:
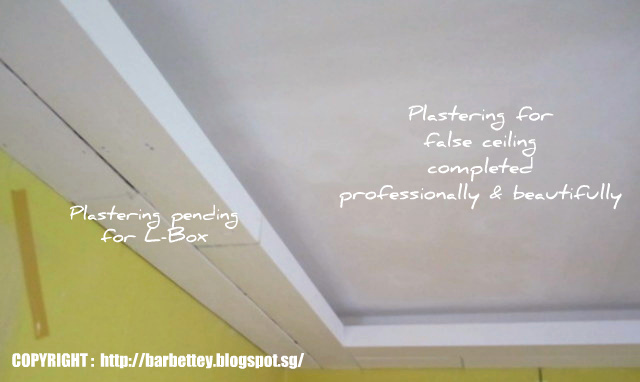
Finally, the installers had almost reached the stage of completion with plastering as shown in the photograph below:
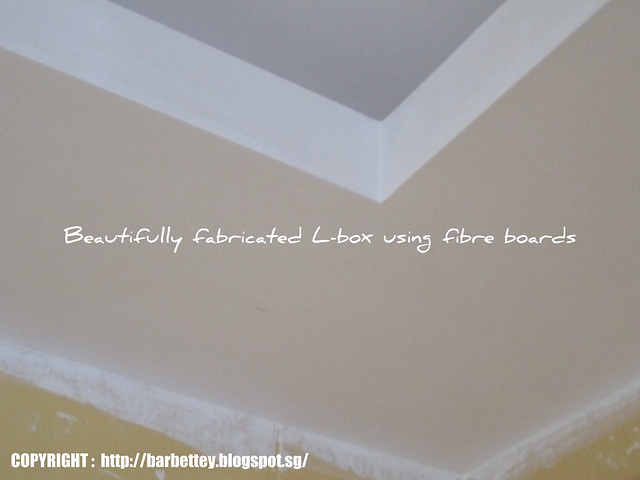
The photographs below show how beautifully the plastering is done for the L-box through close-up shots. We must commend such good workmanship as you could see the beautiful outcome of the L-boxes in the photographs.

The next to be showcased in this stage are cornices which had been applied to a small section of the ceiling in-between 2 bedrooms.
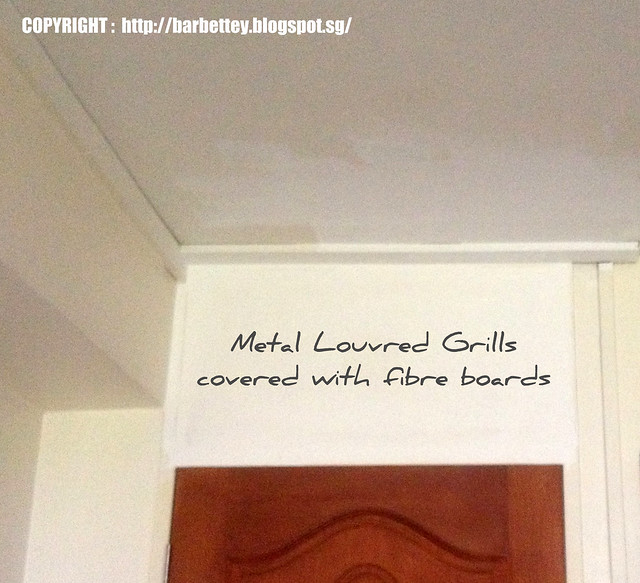
One of these 2 bedrooms had metal louvred grills above its door frame. It was constructed as such by HDB during those good old days where a "spare" bedroom had such a concept of louvres above doors. And I must say that it was quite a silly idea & a spoiler. Not only was aesthetically unattractive, such a concept cheapened the outlook of homes & privacy seems to be somewhat compromised from our perspective.
We were definitely eager to be rid of it without damaging our metal door frame. As such,
SIL BRIGHT had covered both sides of the metal louvred sections with fibre boards.
Please allow us to show a photograph of an "unpolished" version of the area pending any renovation.
SIL BRIGHT had proposed that we converted this section of the ceiling into a leveled false ceiling & installing a single down light where the E27 bulb holder was originally located at.
However, we had decided to forgo any thoughts of making major changes to this section of the ceiling in view of fengshui requirements. As such, it was status quo where the E27 bulb holder was located at - untouched & it remained where it was supposed to be. We opted for a simple cornice design that had been recommended by
SIL BRIGHT's installation team.
Now that we are back to our discussion over the metal louvred grills above the bedroom door, we have taken a couple of snippets of its outcome pending any painting. And the photographs below would illustrate the metal louvred section above both sides of the bedroom door.
A view of the newly fabricated "wall" above the door from the interior of the bedroom.
(pending coating with oil-based sealer & painting)
A clearer view of the newly fabricated wall from the exterior of the bedroom where the cornices were being installed.
(pending coasting with oil-based sealer & painting)
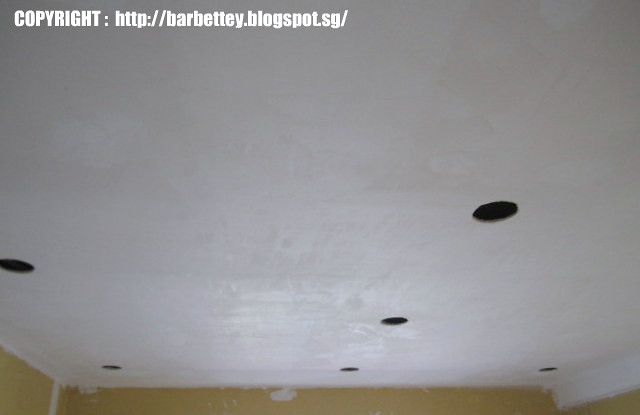
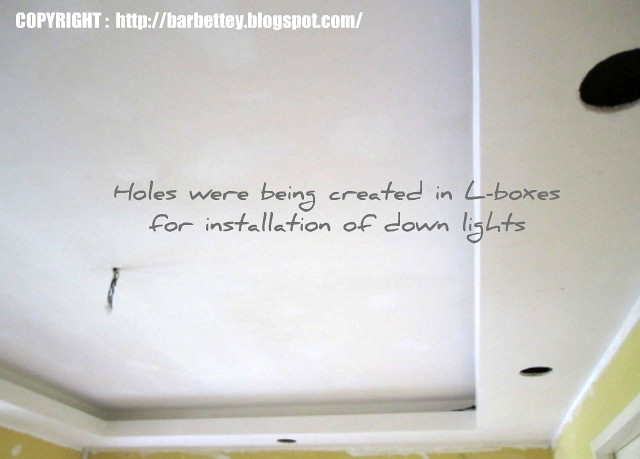
Stage 7 : Creating Holes in false ceiling (for down lights)
We were very happy & somewhat relieved when Mr Lim Hong (electrician) suggested that the hole-cutting take place prior to painting instead of vice versa so as to minimise any visible damages to the false ceiling. Should there be any scuff marks in the process of cutting out holes, there could still be measures taken to touch up the false ceiling before painting is done.
After the holes were being created in false ceiling and L-boxes, white putty cement is applied to "seal" up the raw edges (of these holes).
As this is quite a straight forward process, we are providing a very brief coverage & concluding this segment with these 2 other photographs.
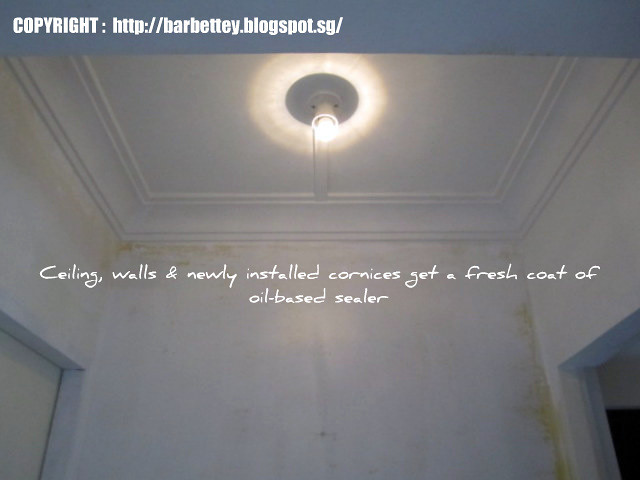
Stage 8 - Part 1 : Applying oil-based sealer
A primer is necessary for newly installed false ceiling & cornices as an oil-based sealer would protect the surface & prevent it from turning patchy. As such, we waited three to four days for the plastering on the false ceiling to "cure" prior to applying any oil-based sealer to it.
As it is highly recommended by NIPPON PAINT for the final coating of paint to be applied only after the oil-based sealer has "cured" supposedly within 5-6 hours (on a sunny day), we have decided to apply the sealer on our own.
The painting team leader for our assignment, Louise, who had impressed upon us as a very patient, helpful man with a strong depth in painting issues, had provided us with many useful tips. As the paint condition of our existing walls were in a very bad condition given the amount of patchy stains on it, he had suggested that we apply oil-based sealer to all our walls which we eagerly did so.
The application of an oil-based sealer was a messy affair. It was extremely tiring as it was a challenge for amateurs in painting to manage the viscosity of the sealer. As the texture of the sealer thickened, it was tough to ensure an even coating on the painted surface. Hubby dearest did the ceiling & cornices whereas I helped out with the walls - it was a very tiring event that took us almost a day. And we rushed through this chore because it would be very tough for us to continue painting through the evening in the absence of any lighting in the living area.
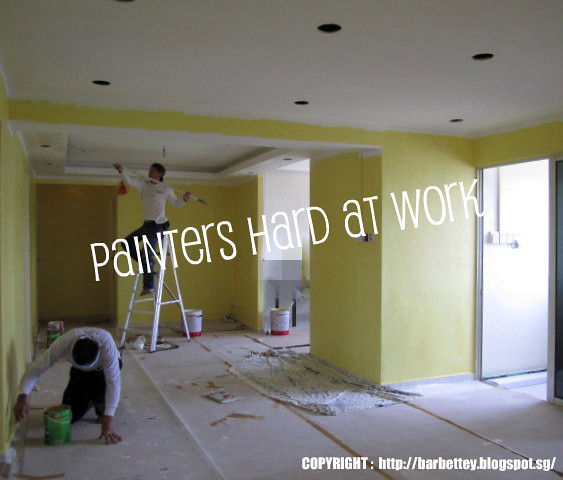
Stage 8 - Part 2 : Getting a finishing coat of paint
As the false ceiling installation for our flat was quite a willful idea that materialized into an ad-hoc decision, paints that were meant for our living room's ceiling & walls were being bought & stored away for 2 years.
The walls & ceiling of our living room were painted using
NIPPON's 3-in-1 MEDIFRESH (Earth Yellow 3142) and white MATEX paint respectively.
Louise team of painters worked through our living room in a breeze. We marveled at how painting could be so effortlessly done by these painters.
What we had gone through with DIY painting was a far cry from their fluid (fluent) strokes with the roller brushes. It was such a breeze for them!
Here are more photographs of painting for our living room :
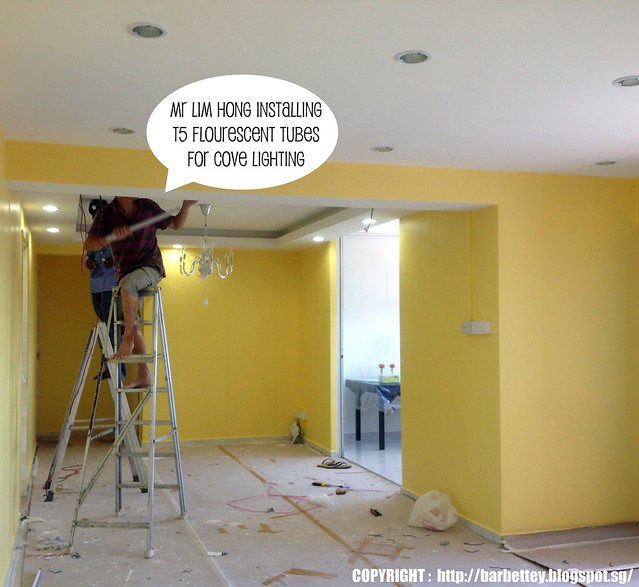
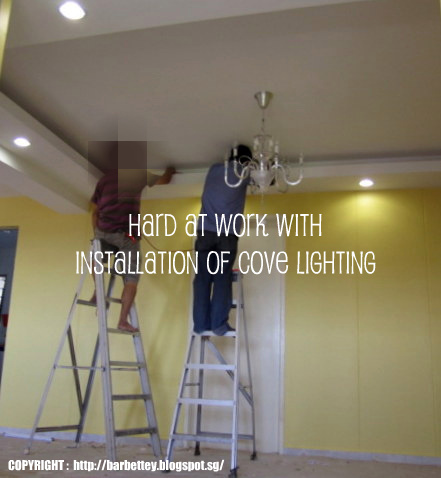
Stage 9 - The Final "touch" : Installation of Down Lighting & Cove Lighting
The marathon of a seemingly long (draggy) march towards completion of renovation works for our ceiling had finally come to a conclusion as Mr Lim Hong had been invited back to give it a finishing touch. :) :) :)
We were all smiles even though we couldn't help but worry about the possibility of scuff marks on ceiling following installation of down lighting. However, we were glad that our ceiling had been paid a lot of attention to while installation of lighting had taken place.
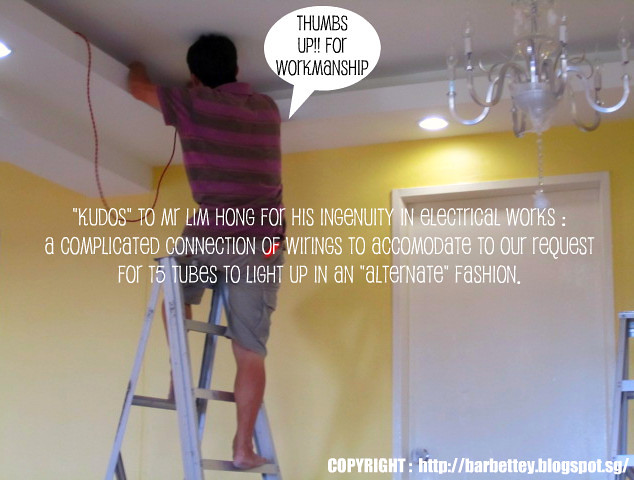
And my hubby had requested that we had 2 separate switches pertaining to our cove lighting. Meaning that the T5 tubes would light up in an alternate fashion when turned on separately. This meant that installation wouldn't come across as straight forward as it should be whereby connectors are used as a means to connect or "join" the T5 which should light up in continuity by just turning them all at one go with 1 single switch.
We noticed that Mr Lim Hong had listened to my hubby's request carefully, studied the dynamics of the wiring "route" above the L-box for our cove lighting and proceeded in running the T5 electrical wiring. I was thankful that my hubby had some knowledge of the type of electrical wiring and had to quickly run down to the nearest hardware store to grab a bundle of it. Mr Lim doesn't use such wiring. As such, we had got to supply him with the wiring that he requested so that our "alternate" lighting could be implemented.
Here are more photographs of the installation process for lighting by Mr Lim Hong and we hope that readers could make sense of what had been done by reading the captions.
The Completed Outlook of our False Ceiling
(pending furnishing)
Although our false ceiling design isn't of a style that is currently trendy by the creative standards of artistically inclined interior designers, we are very much in love with the current concept and would like to say a special thank you to Mr David Teo of
SIL Bright Construction for giving us his valuable recommendations & lending us his advice & counsel, which made it possible for us to sail through this dusty & stressful affair in a breeze. :)
We are extremely relieved that we had taken his advice & as such, had did the right thing in adopting only one cove lighting area for half of our hall which we had intended to convert into a dining area.
And since
SIL Bright Construction is in a niche market of constructing private properties, including landed homes, we would highly recommend
SIL Bright Construction to any private home owner here in Singapore and would like to bring to the attention of all connoisseurs of landed homes & proud home owners of landed origins to consider
SIL Bright should you require any renovation, alterations or construction of a bungalow, terrace house from scratch.
We love every single detail that is implemented for our false ceiling, including our white "milo lid" down light from Jenny at SILIC LIGHTING CENTRE. It was indeed fuss free with E27 light holders & meant to last for a long time since the metal framing was supposedly powder coated in white paint. :)
We would like a showcase a transitional series of photographs, including one that showcases our white "milo lid" down lighting. And please allow us to explain why we had affectionately called our down light as "milo lid" as the outer frame looks like the top view of a tin of MILO. :P
Transitional photographs of ceiling complete with down lighting
(for part of our hall or living area) :
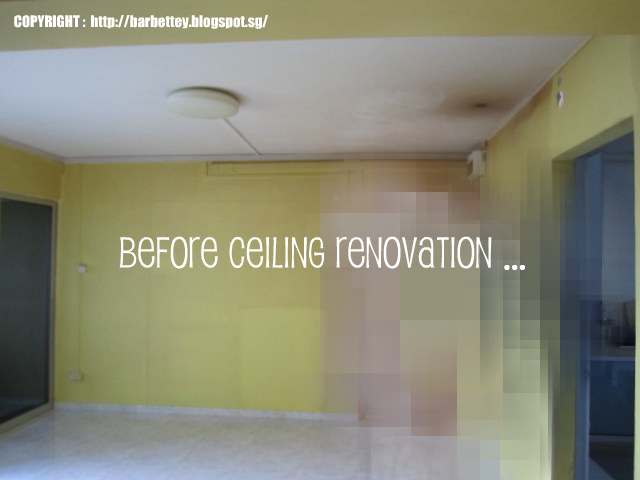
The
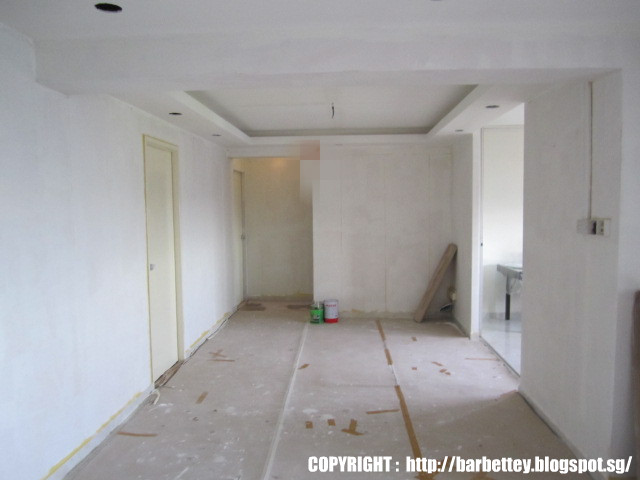
BEFORE stage prior to any false ceiling & touch up ...
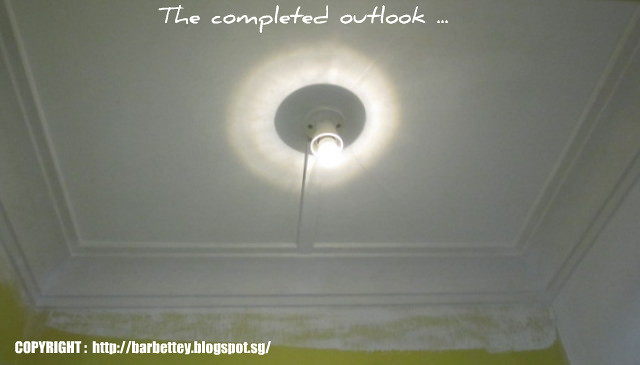
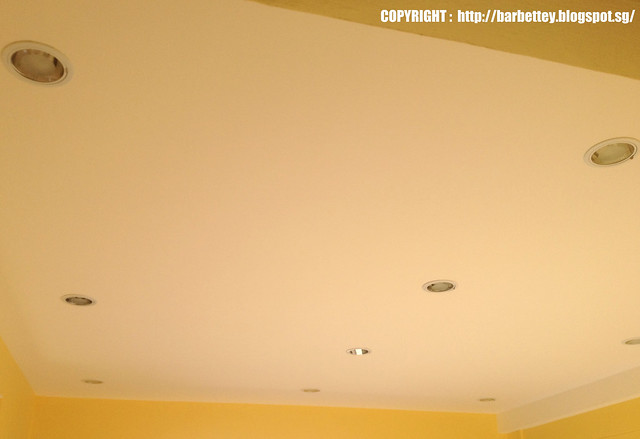
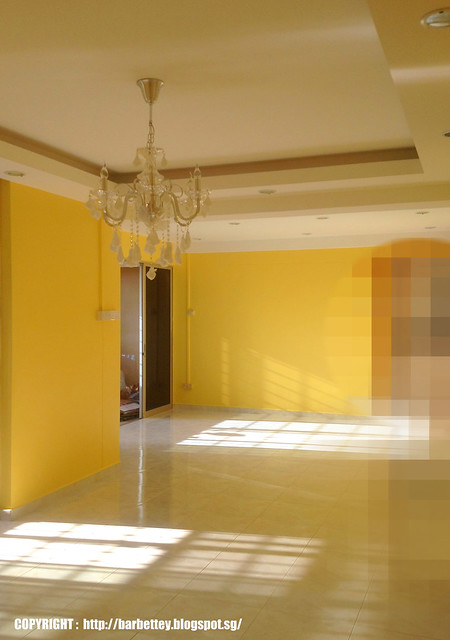
The Completed outlook with installation of down lighting - - sorry about the "warm" appearance as we have taken this photograph in the late afternoon where our living room receives plenty of afternoon sun.
Another photograph taken of the same region without the interference of lighting from the afternoon sun...
Transitional photographs of ceiling complete with down lighting
(for our dining hall) :
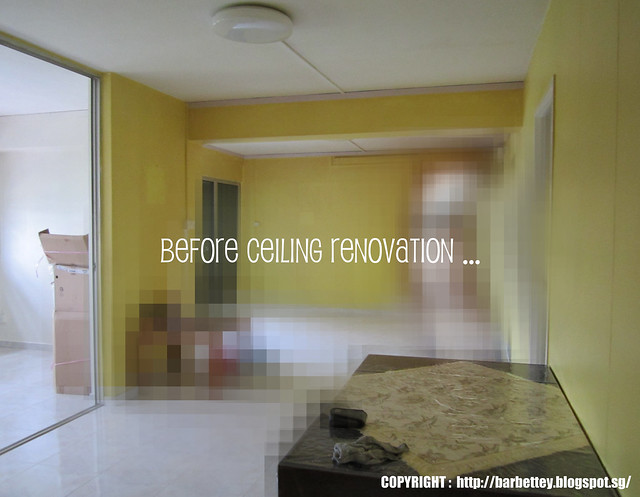
The
BEFORE stage of our dining hall ...
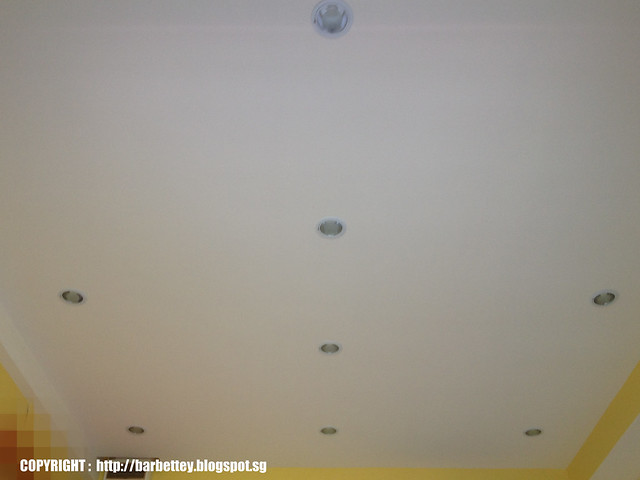
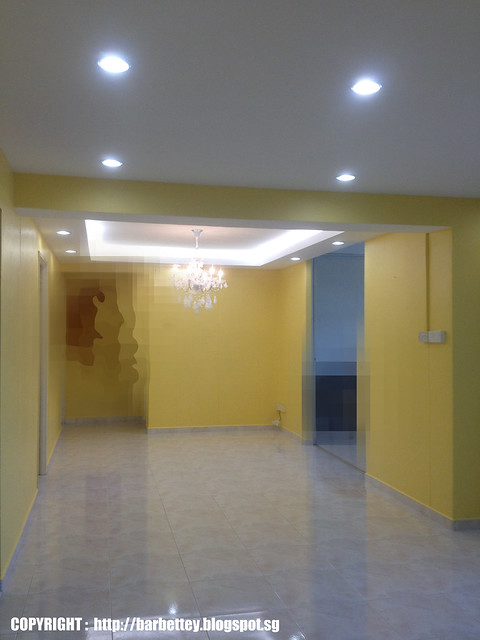
The Completed outlook - sorry about the "warm" tone to the photograph as it is taken in the late afternoon.
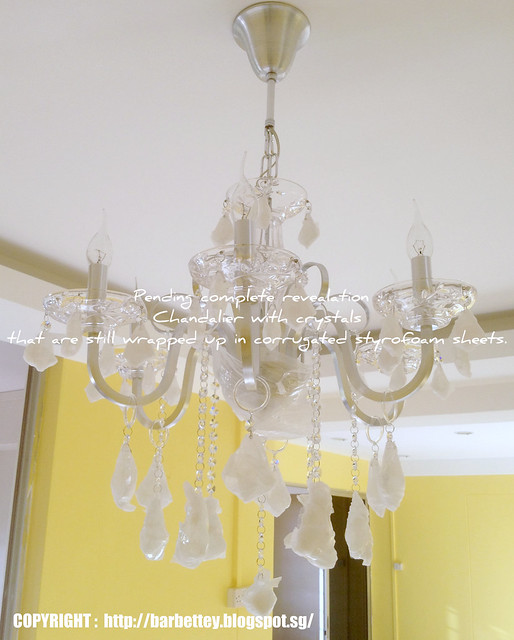
And our feminine looking chandelier which have yet to be fully unwrapped from corrugated styrofoam sheets (protecting it from scratches & dust) pending arrangement of our dining table under it.
More photographs of our home, pending furnishing ...
_________________________________________________________________________________
Disclaimer:
Permission has been sought from the following parties for their products & services to be featured in this blog (in no particular order of preference) :
a)
SIL BRIGHT Construction Pte Ltd
b) SILIC Lighting Centre Pte Ltd
Kindly note that the contents published in this blog is strictly for the purpose of sharing my humble & objective views of products and services provided by the aforesaid companies.
Reader's discretion is therefore sought when viewing this thread.
Thank you for your kind understanding.


